Wednesday, December 29, 2010

...Ni Hao Kai Lan Party continues...

... so there's more...


Our thank you goody bags were chinese take out boxes filled with Kai Lan ping pong paddle, jump robe, a chinese finger trap, a chinese yo yo, and some asian candy. The kids loved it.


For the cake I made cupcakes and put them on my infamous cupcake stand. That sucker somes out for every birthday and holiday. The picks were just images from Google back with a blue cardstock punched with scallop edges. They were than glued to toothpicks with ribbon tied in bows around it. The 3 candle came from the Dollar Tree, love that place!


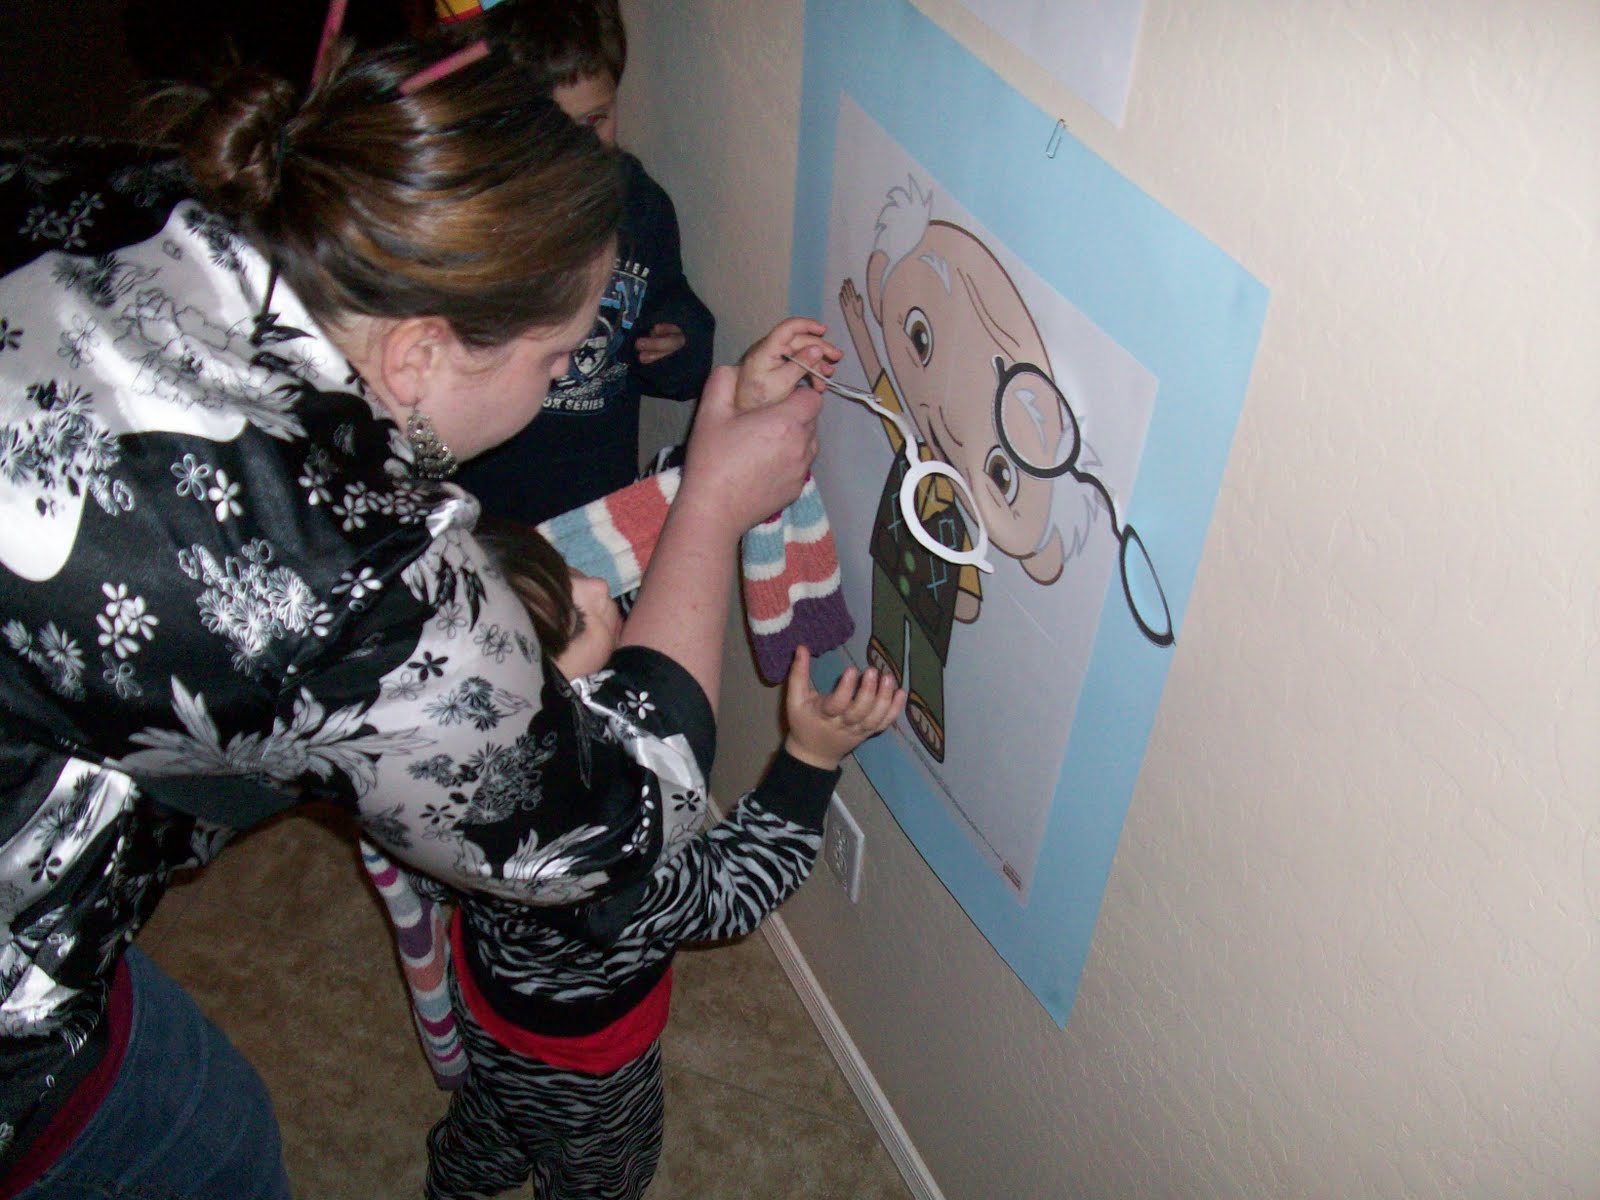
We than played "Pin The Glasses On Ye Ye" The game is a free printable at NickJr.com That game actually turned out to be really fun, even some adults played... it's not so easy when you get spun around 3 times!!


HAPPY BIRTHDAY BAILEY!

Pin It

Bailey's Ni Hao Kai Lan Party!

So my little girl celebrated her third birthday asian style with a Ni Hao Kai Lan birthday party. I made a lot of the decorations and decor for her party that I would like to share...


First were the center pieces. They are just images fron Google that I copied and printed on white cardstock of Kai Lan and her friends. I backed them on red cardstock and glued them to bamoo screwers. I tied bows around the screwers and stock them in a soup can. The soup can I wrapped with the cutest asain paper I found and my scrapbook store. I think they turned out super cute and only cost me about a dollar to make.


...and what's chinese food without chopsticks. I got red ones from my local asian market for about a dollar for 6 pairs. I cut some retangles out of my scrapbook paper, added some slits, and pulled the chopsticks through. I added the three just from a scallop punch and a circle punch.


... next are these yummy fortune cookies and made. I bought the cookies and the asian market too. I dipped them in melting chocolate and added some cute sprinkles. Totally easy and totally cute!!

Pin It

Monday, November 8, 2010

My Thanksgiving Signs...

Thanks to www.craftlyeverafter.com I have some really super cute Thanksgiving signs for my kitchen. Just go to her site and print them off. I than purchased some frames from the Dollar Tree... they had an ugly gold trim so I spray painted them black. Added the pics, hung, and there you have it.


Pin It

My educational blocks...

So I wanted to make something fun but educational for my soon to be three year old daughter. She knows all the sounds of letters but I wanted her to start working on putting the sounds together to make words so I made her these blocks.

I decoupages all the side except for one with cute scrapbook paper. The blank side I spray painted with chalkboard paint. I did this with three blocks but you could make four or five blocks to make more difficult words.

So since the one side is chalkboard I just write letters in and make three letter words for her to sound out and put together. She's getting it little by little, but it definitely helps.


Pin It

Pottery Barn Wanna Be...

So like many others, I go through the Pottery Barn catalog with a dream of someday having enough money to own something from that book. But until than I am a "Pottery Barn Wanna Be". So I've just copied the ideas and made them my own. I loved their mercury glass pumpkins so I went out to on a mission to copy them. I got some ceramic pumpkins from Dollar Tree. I spray painted them white (base coat) and than silver. I used the cheap cans of spray paint at Wal-mart. And now I have some cute decorations for the middle of my kitchen island that I've had up since the begining of October and can keep them up till Thanksgiving. Totally cute!


Pin It

Halloween Spiders...

I know a little late on my post and a long time since I've post but something is better than nothing right?

So I had a Halloween party at my house and I wanted a quick decor for the kitchen island. So I got my cricut out of course.

I had cut out 6 purple spiders and 6 black spiders, all at 3 inches from the Doodle Charm cartridge. I glued some googly eyes (something every crafter should have in their craft drawers) and hung them from my pendant lighting with fishing line. I just taped the line to the inside of the light. I even taped some to the lamp itself for a different look, It turned out so cute. I was so proud of myself.


Pin It

Wednesday, April 21, 2010

Easter 2010

So believe it or not I was actually pretty crafty for Easter... even though I'm just now posting it, about a month later. I've been kinda busy going to Disneyland and Las Vegas that I haven't had time to blog lately. But I will start again. I do want to share my Easter crafts I made though with you all!


This would be the really cute pin wheel treats that I made everyone. I got a 12x12 sheets of scrapbook paper, cut it into 6x6 squares and than scored an "X" going through the center. I cut the "X" leaving an inch uncut from the center, doing this to each corner. I punched a hole in the middle, and each left corner of the cuts. (hope that totally made sense).... I thread each hole through a brad and than through the middle hole. Punch a hole in the top of the pixie stick, attached the pin wheel and closed my ends of the brad. Wa-laa. Put it in the cute Easter basket with some grass and a candy necklace, Totally Cute!


I also made this Easter Egg basket for my little 2 year old Bailey. I took a balloon and blew it up to a good size. You than soak some colored string in some 1/2 water 1/2 elmers glue solution. I use that changing colored string. Start wrapping. You might want to brush on some extra glue to stiffen it more if you'd like and sprinkled some glitter on before the glue dried. Once it does dry, pop the balloon and cut a circle in the front. I use a plate for a stencil. Fill the egg with grass and toys, and go hide it in the yard, let them know the Easter Bunny brought it, even though you won't get any credit for making it, hehe =(


Pin It